Assess and Prepare a Subfloor

Preparing the subfloor correctly is key to making sure your seamless Hospital Flooring is safe and performs well. I suggest you follow these key steps for the best results:
Inspecting the Subfloor and Fixing Damage
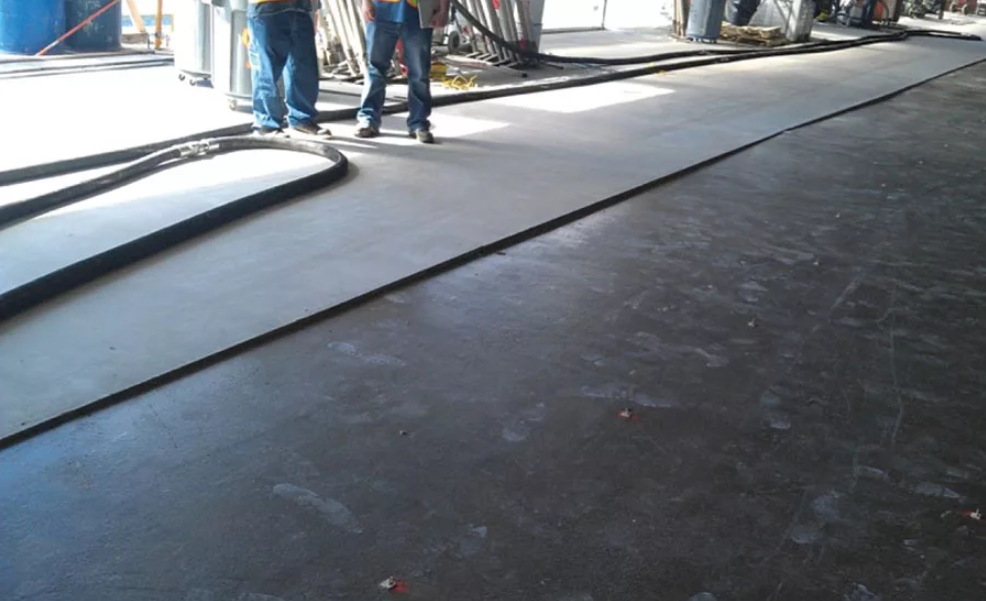
Check the subfloor’s type and condition: First, I identify if the subfloor is concrete, wood, or another material. I’ve found that concrete is a good choice for hospitals because it’s strong and durable.
Look for structural problems: I inspect for any cracks, rot, or uneven spots. You need to remove all old flooring, glue, leftover bits, and dirt.
Fix or replace damaged spots: I suggest fixing any visible damage immediately. In my opinion, the subfloor must be strong and solid to properly support the new seamless flooring.
Leveling the Subfloor
Using a self-leveling compound: I believe uneven floors are a real safety risk in a hospital. I use a self-leveling compound to fill in any low spots. This step makes sure the surface is completely smooth and even.
Lowering risks: Leveling the floor stops it from wearing out too quickly. It also makes it much safer by getting rid of trip hazards.
Controlling and Testing for Moisture
Test the subfloor for moisture: I know from experience that too much moisture can cause mold and make the adhesive fail. I recommend using moisture meters or standard tests (like the ASTM D4263 plastic sheet method) to check how much moisture is in the subfloor.
Install a moisture barrier if you need one: On a concrete floor, a moisture barrier helps stop moisture from coming up. I suggest you install the flooring after you confirm the moisture levels are within the range specified by the manufacturer.
Sample Steps for Hospital Flooring
- I start by removing all debris, wax, and paint from the subfloor.
- Then, I level the floor and fill in any imperfections.
- I use data loggers to track the subfloor conditions. A Wagner Smart Logger helps me watch the room’s environment, while a Wagner Floor Sentry can track moisture for a long time. I record this information to make sure conditions are right.
- I put on the primer and wait for it to dry completely, following the product’s instructions.
- If a moisture barrier is necessary, I’ll install it. I do this only after I’ve double-checked that the moisture levels are within the accepted range.
Plan Layout and Pre-Installation Marking
Good planning and accurate marking are key before installing seamless flooring in hospitals. This approach helps control infections and improves safety. It also means fewer installation mistakes and lower repair costs down the road.
Layout Planning for Infection Control and Efficiency
I suggest creating detailed flooring plans and seam diagrams before you start. The fewer seams you have, the lower the risk of infection. It also makes cleaning much easier.
For example, if you use 9-foot-wide sheet vinyl in a corridor that is 8’6″ wide, you’ll have fewer seams. This can save on labor and make cleaning quicker.
My advice is to avoid putting seams in doorways or busy hallways. I recommend you move seams to the edges of the room or areas with less foot traffic. This stops them from wearing out too fast and prevents germs from collecting.
You should get your site-specific seaming diagrams approved by the infection control or facilities team. Do this before you order materials. This step confirms your design follows all hospital safety rules.
Marking Transition Areas and Critical Zones
I recommend you mark all transition zones, paying close attention to where different floor types connect. You need to plan for any height changes and use seamless, welded transitions. Taking this step helps avoid tripping and stops germs from gathering in gaps.
I suggest using color-coded tape, chalk lines, or paint. This helps show the different floor zones, what glue to use, or where you need to add a moisture barrier.
Coving and Wall Junctions
Make sure you include and mark sections for coving. This is where the floor material goes up the wall at least 100 mm. It creates a smooth, sealed connection. In my opinion, this design is great because it gets rid of corners where dirt and germs can hide.
Installing Copper Conductive Wiring for Hospital Flooring

If your Hospital Flooring needs static control or ESD (electrostatic discharge) protection, you must install copper conductive wiring. Here’s my approach to meeting the necessary safety and functional needs.
Use Copper Conductive Wiring
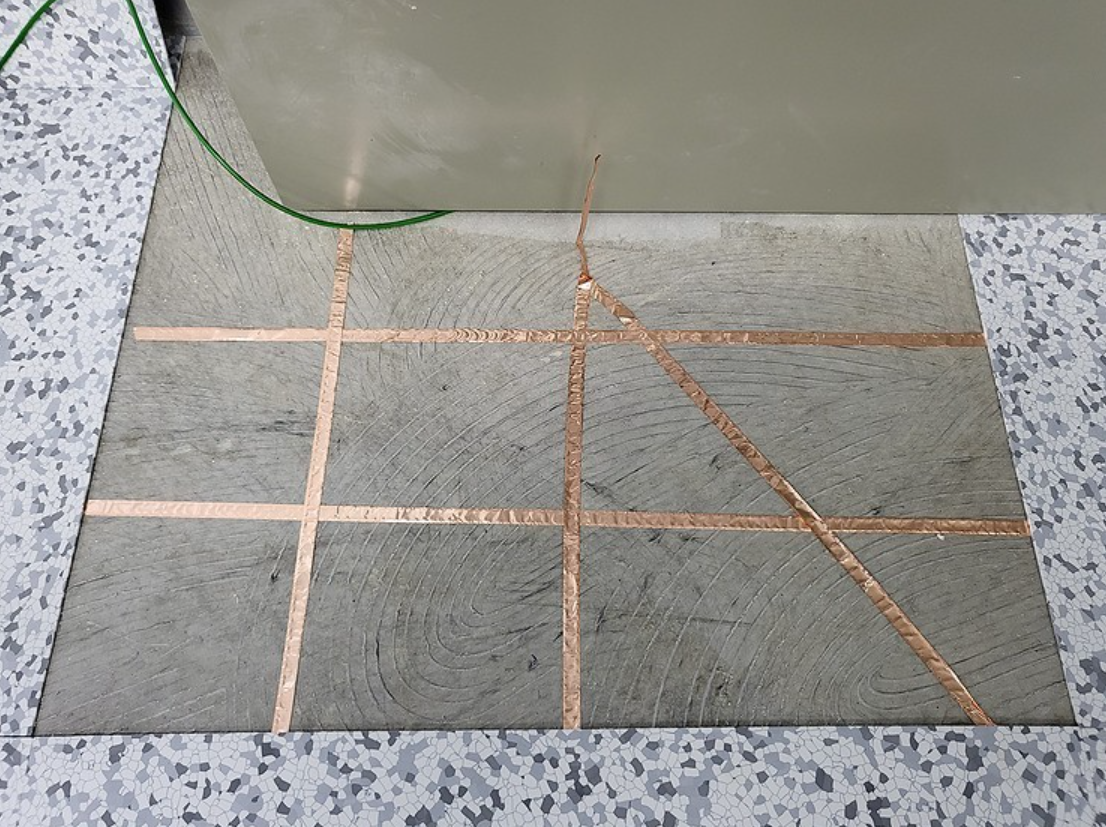
Purpose: I use copper tape or straps to create a path for static electricity to ground safely. This is vital in areas such as operating rooms, labs, or server spaces.
Requirement: Check if the flooring system or building codes require static control. Not every zone in a hospital needs this feature. When it is required, the integrity of my installation is my top priority.
Materials and Specifications I Recommend
Copper Tape:
Conductive, self-adhesive copper tape is the best choice.
Typically use this size: 10 mm wide, 0.05 mm thick, 50 meters per roll.
Conductive Straps:
For grounding, I use 24-inch copper straps and fold them at a 90-degree angle.
Installation Steps for ESD/Anti-Static Flooring
Prepare the Subfloor: Make sure the subfloor is smooth, clean, and dry. Any moisture barriers or primers must be applied first.
Lay the Copper Tape:
Run copper tape around the room’s entire perimeter.
In large spaces, I add extra strips across the floor every 20 feet (about 6 meters).
Overlap the tape at all intersections and corners to ensure a continuous connection.
Ensure a Continuous Circuit:
All tape pieces must touch and overlap at joints to avoid any gaps.
I suggest that each grounding point has at least 6 inches (15 cm) of tape touching the floor.
Grounding:
For any room up to 1,000 square feet (about 93 m²), I install at least one copper grounding strap.
Larger rooms will need more straps—I add one for every additional 1,000 ft².
Attach the strap under an AC outlet’s grounding screw. I use a 24-inch copper strap, bend it 90°, and make a small hole. This lets me secure it with the existing screw for a solid connection to the subfloor tape.
In larger zones, I plan for at least two grounding ports per 600 m² (~6,460 ft²).
Adhesive Application:
Cover the entire tape system with conductive adhesive. I do this before laying the seamless floor.
You can use the wall base to hide the tape’s edge for a clean finish.
Testing and Quality Check:
After Finish the installation, I check all copper runs for full contact and proper overlap.
Verify electrical continuity to every ground point.
I suggest you watch for common failure points. These often include poor adhesive contact or incomplete grounding.
performance and the durability you expect in a busy healthcare setting.
Apply Adhesive and Install Seamless Hospital Flooring

To install seamless PVC or vinyl flooring in a hospital, I focus on precision, good materials, and clean methods. Here is my approach to create a durable floor that helps control infection.
Step-by-Step Seamless Flooring Sheet Installation
Choosing the Right Adhesive
From my experience, it’s best to use high-quality, hospital-grade adhesives. I stick to brands like Fevicol VC31 (water-based) or Arobond 44 (solvent-free). I find that cheap products make the floor weak and can be unhygienic.
For areas needing extra hygiene, I make sure the adhesive is certified as anti-bacterial or fungicidal.
Adhesive Application
Spread adhesive over the entire clean subfloor with a 1/32″ notched trowel. For seams and vent cutouts, I put an 8-inch band of adhesive over the center of each seam. This helps stop any lifting.
I also recommend a 3/8″ nap paint roller to get an even and smooth coat.
Let the adhesive get tacky. The open time changes with the brand. I suggest you never let it form a skin or dry before you lay the sheet.
Laying Flooring Sheets
Cut the sheets to the right size and do a dry run before I put down any adhesive.
To place the sheets, I never drop them flat. Instead, I roll them forward from the center. This method pushes out air and stops bubbles from getting trapped.
Once the sheet is down, I use a hand roller or a light steel roller to press it for the first bond.
Rolling for Proper Bonding
Right after laying the sheet, I roll the floor with a 100-pound roller. I go in both directions to push out air and get the best bond.
I suggest rolling it again after one or two hours to be certain. This is important for high-traffic hospital zones.
Double Gluing Technique
When I work with large sheets, I fold one half back. I glue and set it, then roll it. I then do the same for the other half. I find this method prevents the sheet from shifting and ensures a complete bond.
Seam Treatment
Once all the sheets are down, I work on the seams. I add ½-inch scrap strips on each side. Then, I tape “bridges” over the seams. I leave them for 24 hours. This stops the sheets from moving while the glue cures.
After that, I use a seam sealer where it’s needed.
Heat Welding for Hospital Hygiene
For high-risk areas, I use heat to weld the seams. I wait at least 24 hours for the adhesive to cure first. This process melts the sheets together. It creates a seamless join that is waterproof and bacteria-proof, which meets hospital rules.
Special Materials and Notes
In hospital areas sensitive to static, I have a specific process. After installing the copper wiring, I apply Fevicol adhesive to the subfloor and the back of the vinyl.
For ICUs, clean rooms, and operating rooms, it’s standard to install special antibacterial vinyl and to heat-weld the seams.
Timing and Technical Guidelines
Use 8-inch adhesive bands at the seams. This helps stop future curling and stops bacteria from growing.
With the 100-lb floor roller, I roll right after placing the sheet. Then I roll it again 1 to 2 hours later.
I recommend you never groove the seams for welding until the adhesive has cured for at least 24 hours.
The tape bridges should stay on for 24 hours after using the seam sealer. This creates the strongest bond.
Seam Bonding and Thermal Welding for Seamless Hospital Flooring

To get a durable and hygienic hospital floor, my experience shows you need expert seam bonding and thermal welding. I find these methods are key for floors that last, repel water, and resist bacteria, helping to meet strict healthcare standards.
Seam Bonding Techniques for Hospital-Grade Flooring
Grooving and Routing Seams
When I work with hospital sheet flooring, I rout the seams to a depth of 1/2 to 2/3 of the material’s thickness. I am careful not to cut into the backing. My preferred tool for straight lines is a 3.5 mm (0.138″) router blade with guide wheels. For corners and tight spaces, I switch to a hand groover. After I groove the seams, I make sure to clean out all dust and any leftover adhesive before I start welding.
Strategic Seam Placement
In my projects, I recommend placing seams away from high-traffic areas. This reduces wear and lowers the risk of infection. Before I order any materials, I ask the contractor for a detailed seaming diagram. This is very important if we are using different sheet widths. A good diagram helps me reduce the number of joints in hallways and patient rooms.
Thermal Welding Procedures and Equipment
Adhesive Curing Before Welding
From my experience, I wait at least 10 hours after installing the floor before I begin thermal welding. The only exception is if I use a quick-dry adhesive that lets me start the welding process sooner.
Weld Rod and Equipment Preparation
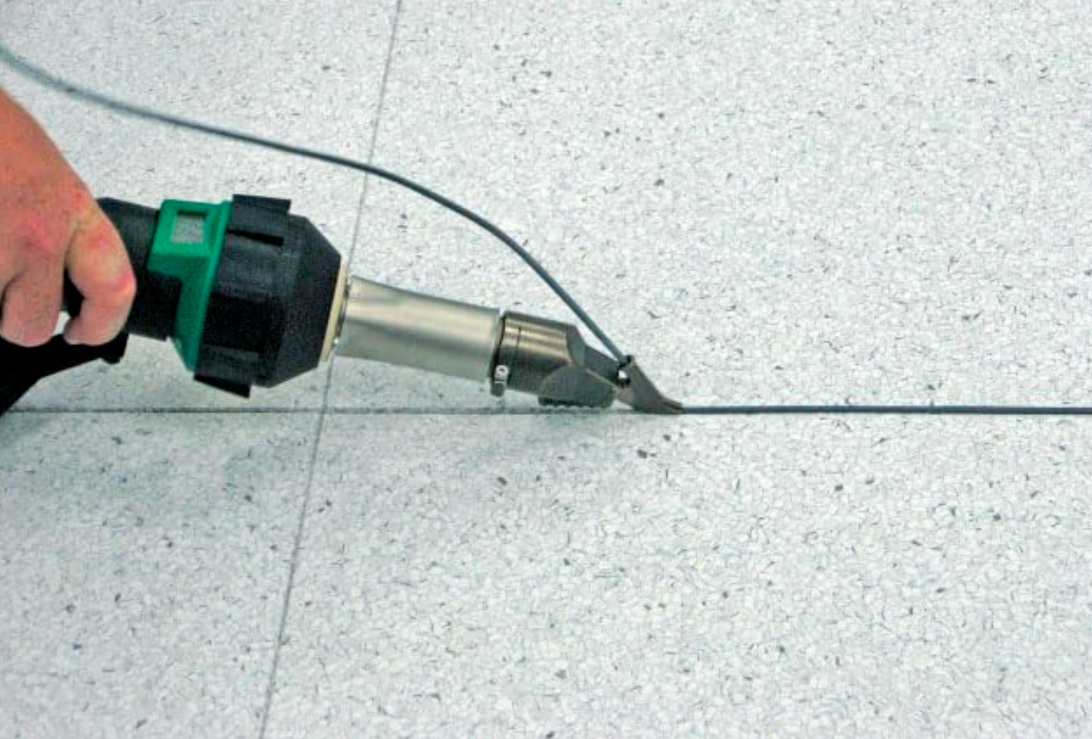
Before I start, I cut the welding rods to cover about three-quarters of each seam’s length. I always pre-heat my heat gun to the exact temperature the flooring manufacturer specifies. For my work, I attach the right nozzle and ensure its bottom is parallel to the floor.
Executing the Weld
As I feed the welding rod into the seam, I pull the gun at a steady pace. This action forms a clear ridge, or “bead,” on both sides of the weld. This bead is my signal that I’ve achieved a good fusion. I make sure not to burn the surface to get a smooth, sealed finish.
Welding Result
When done correctly, thermal welding creates a chemical bond between the sheets. This makes a single, seamless surface. The joint blocks all moisture. I find this creates a very clean floor that holds up to the constant cleaning in hospitals.
Seamless Transitions and Coving Integration
Integral Cove Bases
For sensitive healthcare areas, I suggest installing a flash cove. This involves curving the flooring 100 mm or more up the wall. Then, I weld the joint where the floor meets the wall. This removes the cracks and corners where germs and moisture can gather.
Adhesive Details
I use special adhesives like S-995 or vinyl tapes. I apply them from the floor level up the wall. When the adhesive becomes tacky to the touch, I use a hand roller on the cove. This step ensures full contact and creates a perfect seal.
Hygiene and Durability Benefits
Wheelchair and Equipment Safety
In my experience, welded seams are much smoother. This makes it easier to push wheelchairs. I’ve noted it reduces the push force needed by 20 pounds or more, which is a big help for both staff and patients.
Superior Infection Control
Chemical or thermal welding ensures there are no raised edges or gaps. This design means there is nowhere for dirt and bacteria to hide. As a result, cleaning is more effective, and the floor can meet the hospital’s tough hygiene standards.
Specifications and Practical Checklist
| Element | Detail |
|---|---|
| Seam routing depth | 1/2–2/3 of flooring thickness |
| Weld rod thickness | 3.5 mm (0.138″) |
| Curing/wait time before welding | ≥10 hours (standard method) |
| Seam placement | Away from heavy-traffic and action zones |
| Wheelchair transition force | Push force decreased by ≥20 pounds |
| Typical installed area | 46,000 m² (institutional case size) |
| Cove installation | Flash coving adhesive or tape, rolled by hand |
| Infection control impact | No joints for dirt or bacteria to build up |
Quick Step Checklist:
– Rout seams to the right depth and clean them well.
– Cut the rod to the correct length and set the heat gun to the right temperature.
– Weld at a steady pace to create a solid, bead-edged seam.
– Integrate cove bases and check all connections.
– Inspect your work carefully for any gaps, burns, or weak spots before letting people use the floor.
Final Inspection and Site Handover for Seamless Hospital Flooring
A careful final check is vital before a hospital accepts its new seamless flooring. From my experience, this inspection guarantees the floor will be durable and safe. It also confirms the floor meets standards for infection control. Here is my method for delivering a perfect floor that resists germs and is ready for use.
Comprehensive Seamless Flooring Inspection Checklist
- Surface Quality Review
- Flatness and Levelness
- Moisture and Water Intrusion Testing
- Adhesion and Bonding Verification
- Soundness and Stability
- Surface Hardness and Damage Resistance
- Code Compliance and Safety
Documentation and Correction Procedures
Document every inspection detail, repair, and moisture test result in a formal report. I then submit this report to facility management. They use it for sign-off, review, and future records.
Add detailed photos to my written records. From my experience, this visual proof helps resolve problems and supports any warranty claims.
Any problems, like areas with high moisture or an uneven surface, must be fixed by the installer at their own cost. For instance, if a floor is not flat enough, I will have it ground down and refinished before I approve it.
My handover checklists include 10–15 points. These cover all the important factors for safety, hygiene, and performance.
Seamless Site Handover Protocol
I proceed with the site handover after the floor passes all inspections. Every issue must be fixed, and the entire area must be deep-cleaned first.
A representative from the facility reviews my final report and signs to accept the work. This signed document is important for the warranty and for future maintenance records.
The hospital archives all the documents in its compliance files. This is useful for future audits or upgrades.
